
Travis CI
Travis CI 是国外的开源持续集成构建项目,支持 Github 项目。使用十分方便。
- 使用 Github 账号登录 Travis CI;
- 登录之后会自动同步 Github 项目,选择需要使用 Travis CI 的项目进行设置
- 在项目的根目录新增.travis.yml 文件,示例:
matrix:
  include:
    - language: go
      sudo: true

      go:
        - "1.16"

      install:
        - cd $TRAVIS_BUILD_DIR
        - export GOPRIVATE=github.com/lewinz/*
        - git config --global url."git@github.com:".insteadOf "https://github.com/"

      addons:
        apt:
          update: true

      script:
        - cd $TRAVIS_BUILD_DIR
        - cat /etc/resolv.conf
        - echo "$TRAVIS_BRANCH"@"$TRAVIS_COMMIT"
        - echo $TRAVIS_BUILD_DIR
        - go env -w GOPRIVATE=github.com/lewinz/*
        - go mod download
        - go install ./...
        #- CGO_ENABLED=0 go test -v -coverprofile=coverage.txt $(go list ./... | grep -v 'qvm/test/e2e')

      #after_success:
      #  - bash <(curl -s https://codecov.io/bash)
travis 生命周期
- install - 安装所需的依赖
- script - 执行构建脚本
在 install 和 script 两个步骤前后可以自定义很多步骤:
- Before-install - 在安装阶段之前所需要做的步骤
- Before-script - 在执行脚本之前所需要做的步骤
- After-script - 在执行脚本之后所需要做的步骤
- After-success - 当构建成功时(比如生成构建文档),在 travis_test_result 环境变量下的结果
- After-failure - 当构建失败时(比如上传日志文件),在 travis_test_result 环境变量下的结果
除此之外还有其他几个部署阶段命令,整合后完整的生命周期为:
- apt addons (可选安装)
- cache components (可选安装)
- before_install
- install
- before_script
- script
- before_cache (只有当缓存生效的时候)
- after_success 或者 after_failure
- before_deploy (只有当 deploy 被激活时)
- deploy
- after_deploy (只有当 deploy 被激活时)
- after_script
travis 官方文档。使用起来非常方便,这样当你每次向 github push 代码的时候,Travis CI 就会自动运行.travis.yml 里面的 script。自动进行编译以及运行单测。
Codecov
Codecov 是一个开源的测试结果展示平台,将测试结果可视化。Github 上许多开源项目都使用了 Codecov 来展示单测结果。
Codecov 跟 Travis CI 一样都支持 Github 账号登录,同样会同步 Github 中的项目。在 nodejs 环境下使用 Codecov 需要安装对于的 npm 包,运行下面这个命令进行安装:
npm install codecov --save-dev
这个包的作用是将我们运行单测产生的结果文件上传到 Codecov 上进行可视化展示。同时 codecov 支持的结果文件类型为 cobertura。所以需要保证单测执行的结果文件的类型为 cobertura。 前端项目进行单元测试推进 karma + ‘jasmine’ 的组合。这两个具体是什么东西大家 Google 一下就知道。使用 karma 可以通过简单的配置来运行单测。下面是我一个项目中的配置文件,供大家参考:
// Karma configuration
// Generated on Mon Feb 01 2016 21:34:22 GMT+0800 (中国标准时间)

module.exports = function(config) {
  config.set({

    // base path that will be used to resolve all patterns (eg. files, exclude)
    basePath: '',


    // frameworks to use
    // available frameworks: https://npmjs.org/browse/keyword/karma-adapter
    // 使用的测试框架 jasmine, requirejs 支持模块化加载
    frameworks: ['jasmine', 'requirejs'],


    // list of files / patterns to load in the browser
    files: [
        // karma 中用到进行 requirejs 配置的文件
        'test/test-main.js',
        // 测试中需要用到的文件,includeed 设为 false 表示在页面加载的时候不会加载相应的 js 文件,也就是可以通过 requirejs 进行异步加载
        {pattern: 'node_modules/jquery/dist/jquery.min.js', included: false},
        {pattern: 'node_modules/angular/angular.min.js', included: false},
        {pattern: 'node_modules/angular-mocks/angular-mocks.js', included: false},
        {pattern: 'src/bg-single-selector.js', included: false},
        {pattern: 'test/selector.spec.js', included: false}
    ],


    // list of files to exclude
    exclude: [
    ],


    // preprocess matching files before serving them to the browser
    // available preprocessors: https://npmjs.org/browse/keyword/karma-preprocessor
    // 针对 bg-single-selector.js 生成单测覆盖率结果
    preprocessors: {
        'src/bg-single-selector.js': 'coverage'
    },


    // test results reporter to use
    // possible values: 'dots', 'progress'
    // available reporters: https://npmjs.org/browse/keyword/karma-reporter
    // 测试结果的几种输出方式
    reporters: ['progress', 'coverage', 'verbose'],
    // 测试结果报告的类型
    coverageReporter:{
        reporters: [{
            type:'text-summary'
        }, {
            type: 'html',
            dir: 'test/coverage'
        }, {
            // 这就是 Codecov 支持的文件类型
            type: 'cobertura',
            subdir: '.',
            dir: 'test/coverage'
        }]
    },

    // web server port
    port: 9876,


    // enable / disable colors in the output (reporters and logs)
    colors: true,


    // level of logging
    // possible values: config.LOG_DISABLE || config.LOG_ERROR || config.LOG_WARN || config.LOG_INFO || config.LOG_DEBUG
    logLevel: config.LOG_INFO,


    // enable / disable watching file and executing tests whenever any file changes
    autoWatch: true,

    // start these browsers
    // available browser launchers: https://npmjs.org/browse/keyword/karma-launcher
    browsers: ['PhantomJS'],
    // 运行测试依赖的插件
    plugins: [
        'karma-jasmine',
        'karma-coverage',
        'karma-verbose-reporter',
        'karma-phantomjs-launcher',
        'karma-requirejs'
    ],

    // Continuous Integration mode
    // if true, Karma captures browsers, runs the tests and exits
    singleRun: true
  })
}
通过 karma 进行单元测试,将命令写到.travis.yml 中就可以在每次 build 的时候运行单测,同时运行 codecov [cobertura-coverage.xml 路径] 就会把单测结果上传到 Codecov。在本地运行 codecov 会失败,需要将这个过程加入到 Travis CI 的 build 脚本中,才能成功上传。因为在本地运行就会被作为私有项目,对于私有项目在上传结果时需要加上 Codecov 提供的 token。
在 github 中加入图标
到了最后一步,Travis CI 和 Codecov 都提供图标链接来展示结果。我们只需要将图标链接加入到项目的 README 中就可以看到结果了。
对于 Travis CI 来说,点击下图中的图标:

就会弹出图标的地址。
对于 Codecov 来说,打开项目的设置列表就会看到,如下:
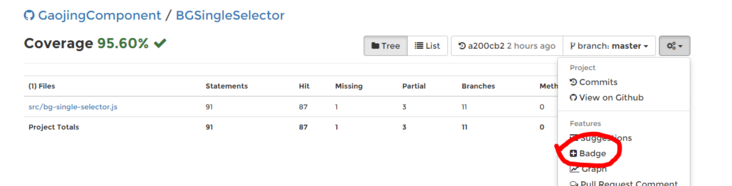
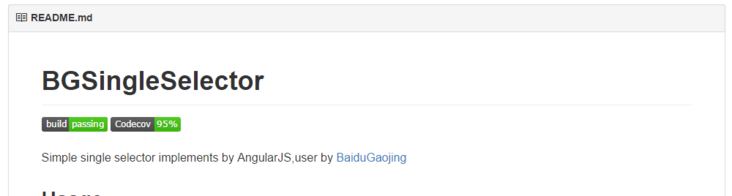
最后只需要将对应的链接加到 README 文件中就可以了。下面是最后的效果:
文档信息
- 本文作者:Lewin
- 本文链接:https://lewinz.com/2021/07/29/travis-ci-codecov/
- 版权声明:自由转载-非商用-非衍生-保持署名